This is a practical guide that will help you to find the polarity and pin configuration of any small bipolar transistor. There is an element of trial and error involved. But since we're dealing with a limited number of variables - the task is not too daunting. There are only three leads - collector - base - and emitter. If your meter has a transistor tester - you could simply try all of the six possible pin configurations - in both polarities. 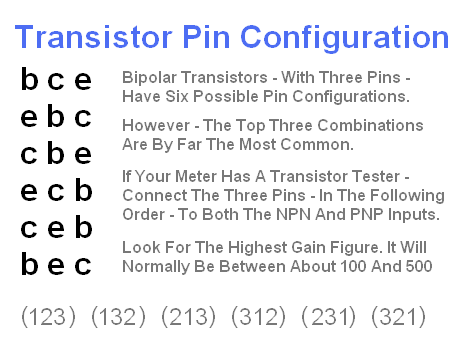
Comparing NPN and PNP Transistors Small bipolar transistors fall into two groups - NPN and PNP. The emitter of an NPN transistor is connected to - or towards - the negative line. And its collector is connected to - or towards - the positive line. An NPN transistor switches on - when current flows INTO its base pin. And it switches off when this base current ceases. The small arrowhead - in the symbol - indicates the direction of the base current. 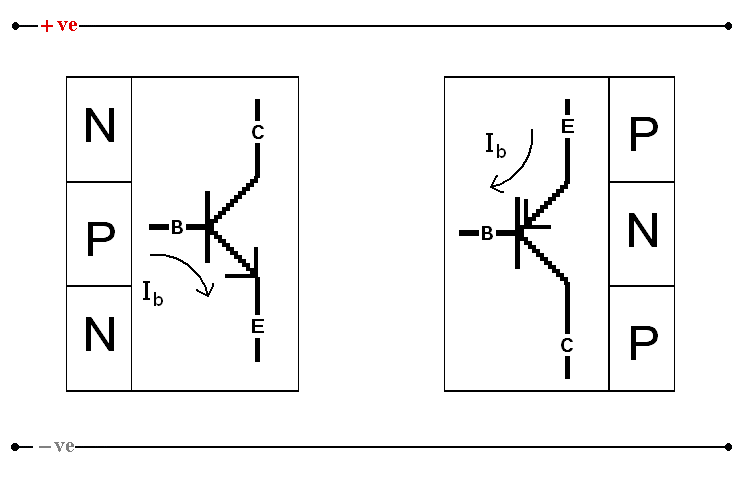
Compared with NPN transistors - PNP transistors are connected upside down - and operate back to front. The collector of a PNP transistor is connected to - or towards - the negative line. And its emitter is connected to - or towards - the positive line. A PNP transistor switches on when current flows OUT OF its base pin. And it switches off when this base current ceases. The small arrowhead - in the symbol - indicates the direction of the base current. Identifying A Transistor's Polarity If you have a moving coil meter - or your digital meter has a diode tester - you should begin by identifying the polarity of the transistor. Since we're going to use the meter to identify the polarity of the transistor - the polarity of the meter leads is crucial. Before you start - make absolutely certain that your leads are connected the right way round. Then begin by finding the collector and emitter diodes. These diodes will conduct - when the red meter lead is connected to a "P" terminal. 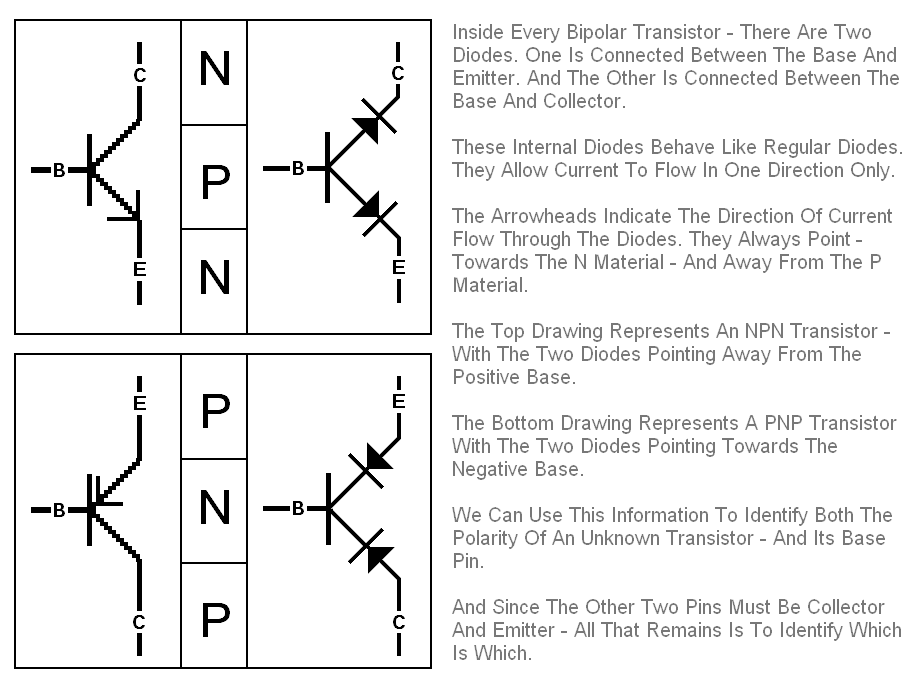
When you've identified the polarity of the transistor - and its base pin - one of the following small circuits will help you identify the collector and emitter. Build the circuit on your breadboard. And plug in your transistor. You already know where the base pin should go. Use trial and error to position the other two pins. If the LED glows - even dimly - the collector and emitter are connected the wrong way round. If the collector and emitter are connected correctly - the LED will not light. Next - wet the tip of your finger with the tip of your tongue. And use your wet fingertip to join the collector to the base. If your transistor is working properly - and connected correctly - the moisture will supply sufficient base current to switch the transistor on. And the LED will light.
If you don't have a moving coil meter - or a diode tester. You can still use these two circuits to identify the polarity of your transistor - and its pin configuration. Just use the "Transistor Tester" technique described above. Try all six possible pin configurations. The first three are the most likely. When you can light the LED with a moist fingertip - the transistor is connected correctly.
|
 SUGGESTIONS