Relays are very versatile - but they're not magic. All they do is make and break sets of mechanical contacts. With careful observation - and a little logical thought - you can work out exactly what's happening inside the case. Start by finding the two pins connected to the relay coil. You can do this with your multimeter. The coil pins will be the only pair that exhibit a resistance. It's likely to be somewhere between about 50Ω and 1000Ω. Low voltage DC relay coils obeys Ohm's Law. That is: - Current = Voltage ÷ Resistance. For example - the standard version of the 12v Omron G2E relay - has a coil resistance of 330Ω. So the current through the coil is 12v ÷ 330Ω = 36mA. Always check for any markings that indicate coil polarity. Relay coils give off high reverse-voltage spikes that will destroy sensitive electronic components. These spikes are generated by the coil - when the relay de-energizes - and the coil's magnetic field collapses. They are generally removed by fitting an external suppressor diode - across the relay coil. See diode D1 on this Repeat Timer Schematic. However - Very Rarely - you'll find a relay that's fitted with an internal suppressor diode. If there is an internal suppressor diode - it's important that the coil is connected the right way round. Otherwise the diode will cause a short circuit. So - always check for polarity markings - just in case. You'll probably find that most relays will work satisfactorily with a range of supply voltages. For example - the standard 12v G2E will work from about 8 Volts - up to about 14 Volts. If you have no idea what voltage your coil is - start with say 3 volts - and increase it until the relay energizes. Next - switch the power off - and turn your attention to the remaining pins. With your meter - you should be able to divide them into two groups. Some pins will be joined together in pairs. And some pins will stand alone - with no connection to any other pin. Take a careful note of each. Although there will be exceptions - the stand alone pins are likely to be normally-open contacts. And the pairs of pins are most likely to be the pole and normally-closed contacts. Start with a normally-closed pair. One will be the pole - and the other will be the normally-closed contact. When power is applied to the coil - the pole will part from the normally-closed contact - and establish a new connection with the normally-open contact. When you switch off the power, the pole should part from the normally-open contact - and return to the normally-closed contact. 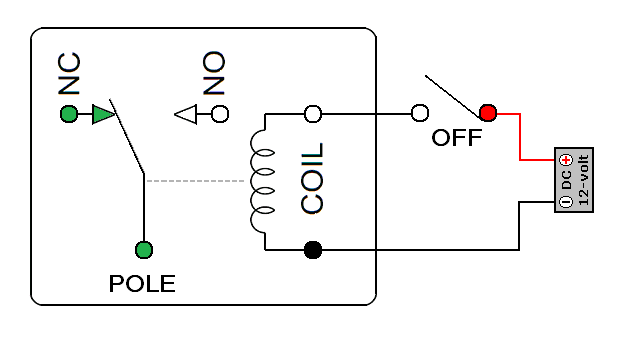
Your relay may have several sets of these change-over contacts. But the technique is always the same. Identify a pair of pins that separate when power is applied to the coil. One of those pins is a pole. It will establish a new connection with one of the stand alone pins. And that pin is the normally-open contact. There are countless different types of relays - too many to consider here. I have described the behaviour of the standard - common or garden - type. The majority of relays are of this type. But - there are exceptions. Some relays have more than one pin connected to a contact. For example - the pole of the G2E is connected to two pins. Some relays are simple one-way - on/off - switches. These have no normally-closed contacts at all. Some relays have two coils. These are designed to reverse the direction of DC motors. Some relays have built-in latches that keep the relay energized after power to the coil is cut. Some relays have the transistor switch built-in - and require an additional small base current to energize. Some relays have the suppressor diode built-in. So - to avoid a short-circuit - the power connections to the coil - MUST be made the right way round.
|
 SUGGESTIONS
